
Who cares about January diets? Anyway, these are some tasty treats you can enjoy as much as you like! Try experimenting with different colours for added flavour!
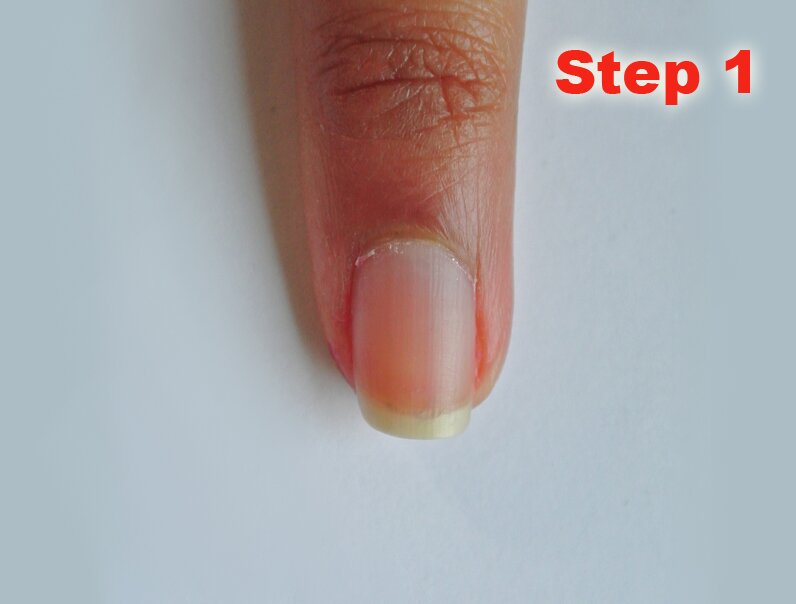
Cut, file, shape, buff! Don’t forget to use cuticle oil to keep your nails healthy! Just as a tip before you start, when applying each colour don’t make it too thick otherwise it will take a while to dry and if you can, leave a gap in the center to add the next colour.
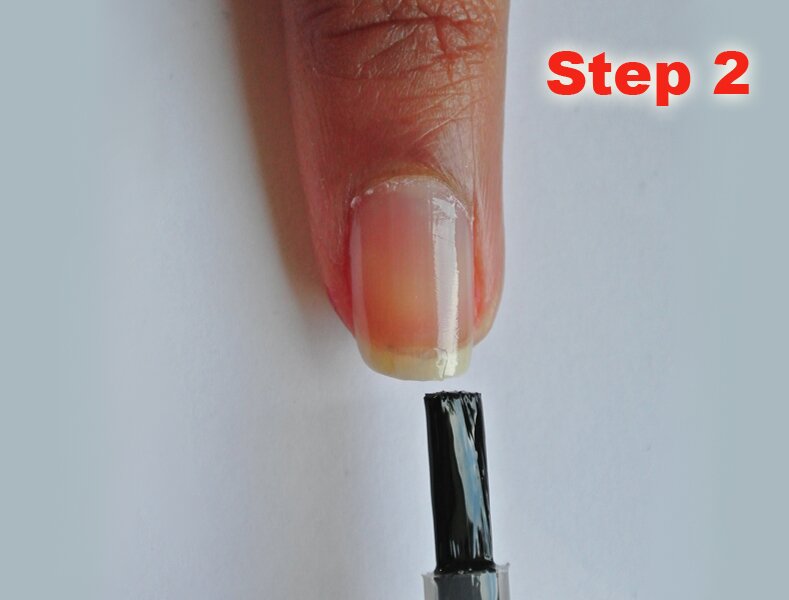
Apply a basecoat to make your pattern last longer but also to stop the polish from staining your nails.
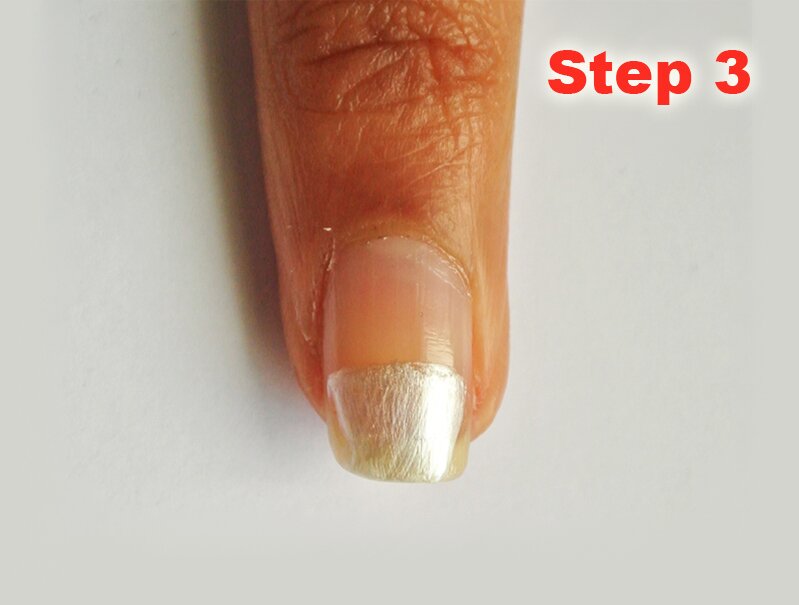
With the brush in your polish, create a base to the cupcake by filling in the tip of your nail.
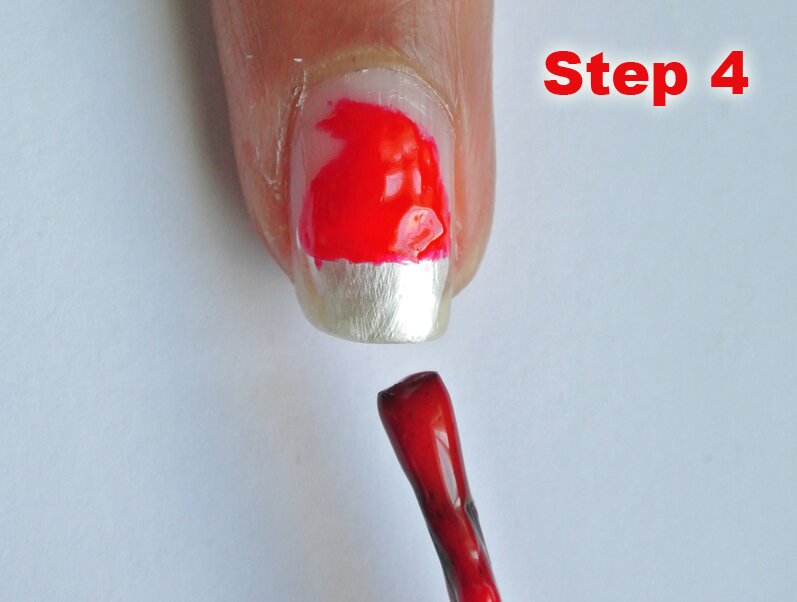
Again with the brush in your polish add a swirly shape to create the yummy icing!
With a fine tip brush add detail to the cupcake case by outlining the shape you created and adding random black lines inside.
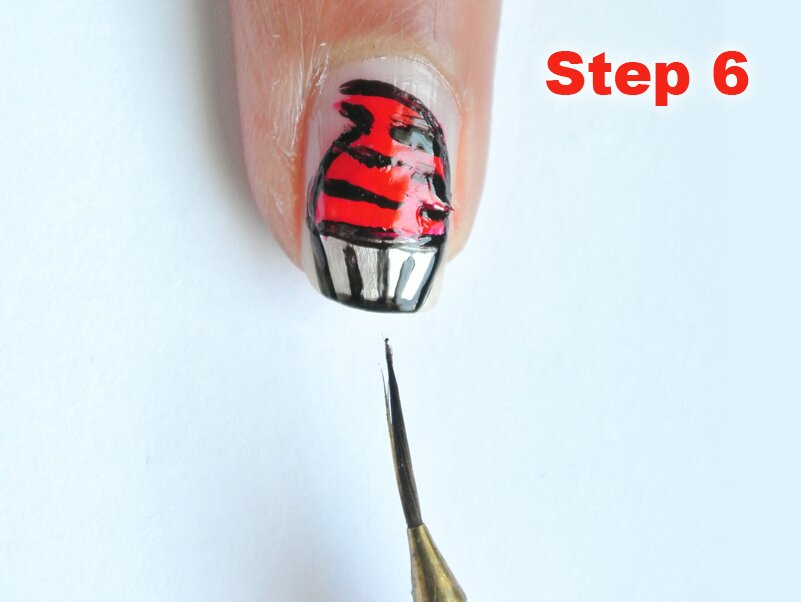
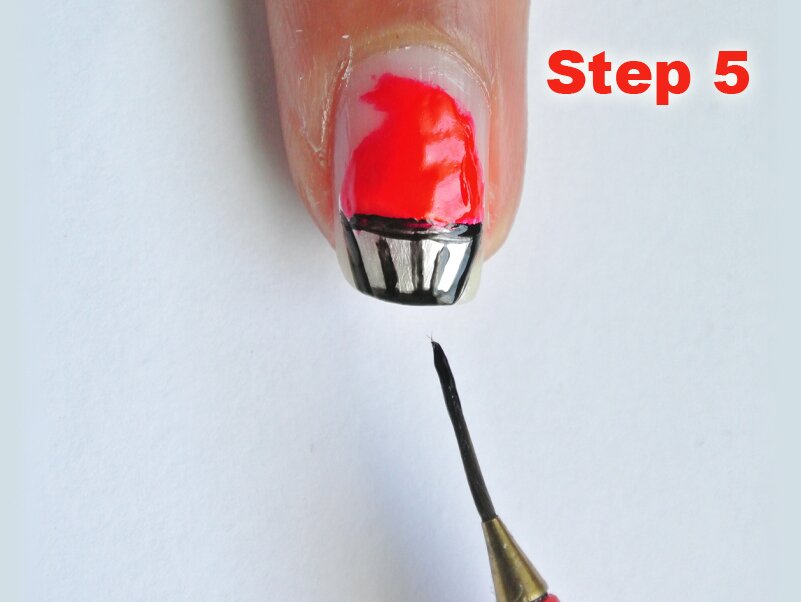
Almost there! Adding more detail with your fine tip brush, outline the icing and add creases on the sides to create a swirl effect.
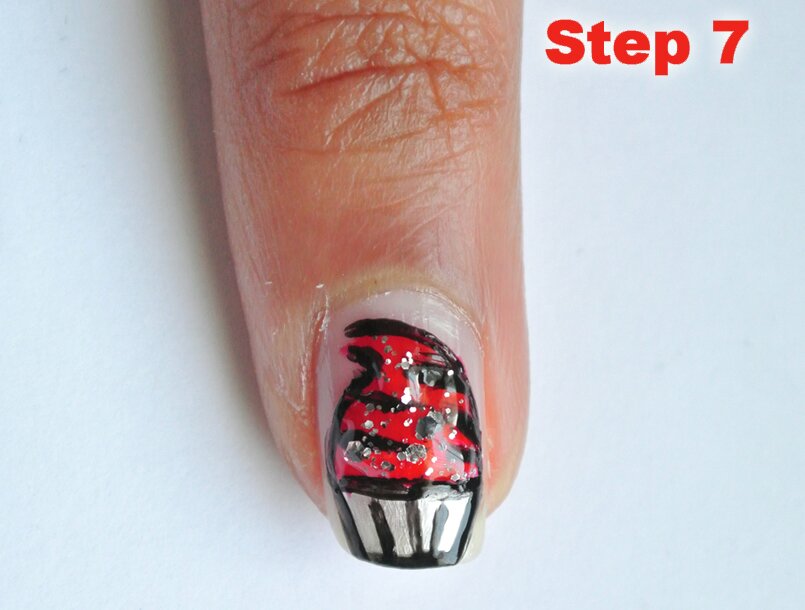
This step is optional, you can add some glitter to the icing to give it a nice shimmery effect.

Finally wait for the design to dry before adding the top coat to seal in the pretty pattern!